FREE US SHIPPING ON ORDERS $175+

Translation missing: de.general.language.dropdown_label

Translation missing: de.general.currency.dropdown_label

0 Einkaufswagen
In den Einkaufswagen
    Sie haben Artikel in Ihrem Warenkorb
    Sie haben 1 Artikel in Ihrem Warenkorb
      Gesamt

      Game Development

      Steam Controller Configuration

      Steam Controller Configuration


      How do I enable Steam Controller Configuration?

      1. Open the Steam application, and click the Steam in the menu tab.


      2. Once you've clicked Steam, select Settings.


      3. In the pop-up box, click Controller.


      4. Once you've clicked the Controller, select General Controller Settings below the Controller Configuration.


      5. Place a checkmark in the box for your controller type.


      6. In the upper right-hand corner, open Big Picture Mode by clicking the icon.


      7. Once it's open, click the Library button.


      8. Select Bite the Bullet.


      9. Select Manage Game.


      10. Click the Controller Configuration.


      11. Click the Browse Configs button.


      12. Select the available standard controls config in the Recommended section.


      13. Click the Apply Configuration button.


      How do I disable Steam Controller Configuration?

      1. At the upper right corner of Steam, click on the Big Picture Mode button.
        This will open Steam Big Picture Mode, in full screen.


      2. Click on the Library button.


      3. Select Bite the Bullet.


      4. In the left-hand column, click on the Manage Game button.


      5. Click the Controller Options button.


      6. Click the Steam Input Per-Game drop-down box.


      7. Select Forced Off.


      8. Launch Bite the Bullet to confirm that your controller is recognized.
        Note: If your input is still not being recognized, you may need to relaunch Bite the Bullet.


      Setting up a Charity Live Stream using Tiltify on Twitch, Facebook or Youtube

      Setting up a Charity Live Stream using Tiltify on Twitch, Facebook or Youtube

      1. Create or sign in to your Tiltify account: https://tiltify.com/
      You can also use the Feeding America Tiltify URL:
      https://tiltify.com/feedingamerica/bite-the-bullet-1/start/type


      OR


      2. Click "Get Started," and search for the charity you want to support.
      You can register for Feeding America directly at:
      https://tiltify.com/feedingamerica/bite-the-bullet-1


      OR


      3. The platform lets you choose to support an event already happening for your selected charity, or it lets you register as an individual and support your charity directly.


      OR


      4. Enter the requested information.


      5. Click "Create Campaign" then "Publish Campaign"!
      (Before publishing, you may have to confirm your account via your email.)


      THEN


      6. In your Campaign's Dashboard, there are links where you can copy your Campaign URL for sharing and your Donate URL to put the donate button onto your Twitch page.


      7. Stream your game on a site like Twitch, YouTube, or Facebook.


      8. Share with your followers and on social media.


      9. RAISE FUNDS FOR YOUR CHARITY!


      Bite The Bullet Twitch Assets

      Bite The Bullet Twitch Assets


      Some of the most important aspects of being a streamer is creating the channel page. Your channel page is where you can put your informations about you and your stream for your viewers to see.


      Click the button below to download the Bite The Bullet Twitch Asset!

      Use the table below as reference to the proper sizing of graphic that you can use on your Twitch channel.


      OPTIMIZE YOUR FILE SIZE

      Twitch is pretty flexible when it comes to the file size of images that you can upload and use for your page. In general, we’re working with a 10 MB size limit. If you’re over the limit, and haven’t quested your way to higher graphics editing XP, use a tool like EZ Gif or Tiny PNG with lossless compression.


      TO GIF, OR NOT TO GIF

      This is entirely up to the individual. As a general rule of thumb, you don’t need to GIF hard in most cases. GIFs are great for animations like emotes. For general customization on your Twitch graphics, you will want to stick to PNG or JPG. PNG files are perfect for cases where you need to maintain transparency in the background. There are significant file size differences for both, and JPG offers better compression and smaller overall files.


      LET’S MAKE SOME TWITCH GRAPHICS

      The world is your oyster, and you have infinite options when it comes to your graphics.

      If you’re not a Photoshop pro, stroll over and download GIMP for digital design. If GIMP isn’t doing it for you, simple apps like Placeit get the job done fast and with great results. It’s the perfect option for the graphics novice, and a streamer beginner that doesn’t yet have a fully distilled brand style guide to work from.

      Take a template and tweak until your heart is content. Save it, upload it to Twitch, and you’re in business!


      BITE THE BULLET TWITCH PROFILE BANNER (COVER PHOTO)


      The Twitch Profile Banner is the first thing visitors and fans will see when they visit your Twitch profile. Let’s make a great first impression.

      • 1600 x 480 pixels image size
      • Less than 10MB file size
      • PNG, JPG, or GIF image type.


      UPLOADING YOUR TWITCH BANNER ON CHANNEL:

      1. On the top right-hand side of your screen, click on your avatar, then choose "Channel" from the drop-down menu.
      2. On the top left-hand side of your screen, click on your avatar by your name to show your banner.
      3. Hover over the banner, then click “Update Profile Banner”.
      4. Choose the file you want to upload as your banner from your computer. Your banner will upload and be resized to fit the space (if it is the wrong dimensions).


      UPLOADING YOUR TWITCH BANNER FROM CREATOR DASHBOARD:

      1. On the top right-hand side of your screen, click on your avatar, then choose "Creator Dashboard" from the drop-down menu.
      2. Click your avatar again (the options will have changed) and choose “Settings”.
      3. Find the profile banner section and click the “Update” button.
      4. A box will appear that says “Upload a Photo”.
      5. Choose the file you want to upload as your banner from your computer. Your banner will upload and be resized to fit the space (if it is the wrong dimensions).


      BITE THE BULLET TWITCH OFFLINE BANNER


      This is the graphic that shows when your channel is offline. This is a 16:9 resolution that your monitor is most likely using right now, as well as the current generation HD standard. To my retro friends: I know you love and live the 4:3 life!

      For this banner, you will need:

      • 1920 x 1080 image size
      • Less than 10MB file size
      • PNG, JPG, or GIF image type.


      SETTING AN OFFLINE BANNER:

      1. Select "Choose a Video" under the Channel Trailer heading.
      2. Review the onboarding tips then dismiss the welcome message.
      3. If you need to upload a trailer: At the top of the setup page, select Video Producer.
      4. Click "Upload" and select the video to upload from your computer.
      5. Once the upload is complete, click the three dots menu of the upload you wish to set as a trailer, review it and the trailer title and then select "Set as Trailer" and you're done!
      6. If you already have an uploaded trailer: Select the video from your library. Review it and the trailer title and then select "Set as Channel Trailer" and you're done!


      BITE THE BULLET TWITCH THUMBNAIL


      UPLOADING A THUMBNAIL:

      1. Go to your Video Manager.
      2. On any past broadcast or highlight, click Edit.
      3. Under the Upload Custom Thumb section, select Choose File.
      4. Choose your desired image. Image must be 16:9 (minimum size 1280 x 720).
      5. Click Upload.
      • Recommended Size: 1280 x 720 pixels
      • Maximum File Size: 10MB
      • Accepted File Types: JPEG, PNG, & GIF


      BITE THEBULLET TWITCH WEBCAM (OVERLAYS)


      • Recommended Size: 1920 x 1080 pixels
      • Maximum File Size: 40MB (Variable)
      • Accepted File Types: PNG (Static) & GIF (Animated)


      BITE THE BULLET TWITCH CUSTOM EMOTES


      We love custom emotes. You love custom emotes. Let’s make custom emotes!

      You will need three sizes: 28 x 28, 56 x 56, and 112 x 112 pixels. Ideally, all three versions of every emote will be used here. Each will have to be in the PNG format and under 25KB.

      • Three file sizes (28 x 28, 56 x 56, and 112 x 112 pixels)
      • PNG file type
      • Under 25KB file size


      BITE THE BULLET TWITCH PROFILE PICTURE (LOGO)
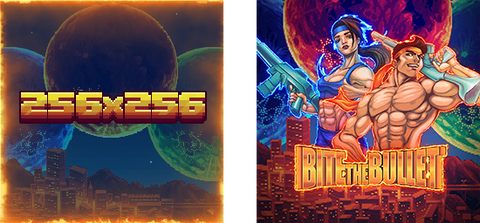


      The logo, profile picture, or avatar is the most prominent graphic for your Twitch page.

      • 256x256 file size
      • PNG or JPG file type


      UPLOAD PROFILE PHOTO THROUGH THE WEBSITE:

      1. Go to twitch.tv and log into your account, and then click your profile icon in the top-right corner of the screen.
      2. Click your current profile photo again to be taken to your settings.
      3. Under the "Profile" section of your account settings, click "Update Profile Picture".
      4. Select "Upload Photo" (or "Edit Current Thumbnail" if you want to simply re-crop your existing profile photo).
      5. Select the appropriate photo from your computer.
      6. Crop and rotate your profile photo as desired, then hit "Save".


      UPLOAD PROFILE PHOTO THROUGH THE MOBILE APP:

      1. Open the Twitch app on your iPhone or Android device, and from any page, tap your profile picture in the top-left corner.
      2. Your profile will be shown then in the top-right corner, tap the Gear Icon and then select "Settings".
      3. A menu will appear then tap the first option, "Account".
      4. Tap "Edit Profile".
      5. Tap "Select Image" on the page that appears. You'll then be able to either take a photo, or choose a photo from your device's camera roll.
      6. Once you've selected and cropped the photo, tap "Save" in the top-left corner.


      BITE THE BULLET TWITCH SUB BADGE


      Sub badges appear next to Twitch users that have subbed to your channel. Like custom emotes you’ll need three sizes for each badge as well. They all have to be in the PNG format and under 25KB.

      • 25KB File Size
      • PNG file type
      • You must upload the image in three different sizes: 18px x 18px, 36px x 36px, and 72px x 72px.


      BITE THE BULLET TWITCH PANELS
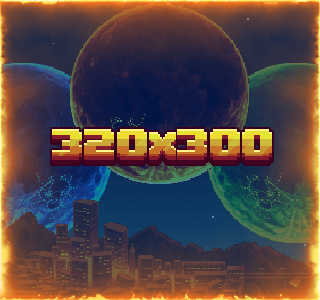


      Twitch panels appear under your beautiful Twitch stream. The maximum file size is 320 x 300, but any perfect square can work.

      Mega Cat recommends either a 320 x 160 or 320 x 100 file. This gives you something more rectangular and doesn’t push the content down as much. Panels are typically made for about, contact, donation, social media, hardware, rules, and subscription sections.

      • Less than 10MB file size
      • PNG file type


      TO CREATE OR EDIT A PANEL:

      1. Click the Edit Panels switch in the top left of your channel page underneath the video screen from OFF to ON.
      2. Edit the panel as you wish by inserting title, icon, embedded image link and description to the panel (where you can attach further links using Markdown code)
      3. To save the panel, click Submit.
      4. Click the + sign to add a new panel and a new panel will appear.
      5. To see your finished panel look, click the Edit Panels switch from ON to OFF to return to the regular channel page view.


      TO DELETE A PANEL:

      1. Click the Edit Panels switch in the top left of your channel page underneath the video screen from OFF to ON.
      2. To delete a panel, click Remove.
      3. To see your finished panel look, click the Edit Panels switch from ON to OFF to return to the regular channel page view.


      TO REARRANGE YOUR PANELS:

      1. Click the Edit Panels switch in the top left of your channel page underneath the video screen from OFF to ON.
      2. The movement cursor icon will only appear if you hover over the panel you wish to move.
      3. Click on the panel and drag it in the panel arrangement to your preferred position.
      4. Hold left-click to release the panel to your desired location.
      5. To see your finished panel look, click the Edit Panels switch from ON to OFF to return to the regular channel page view.


      BITE THE BULLET TWITCH ALERTS


      SETTING UP YOUR TWITCH ALERTS:

      1. Go to StreamLabs and log in with your Twitch account.
      2. Once logged into the StreamLabs with your Twitch account, click on Alert Box from the left menu.
      3. At the top of the screen, you will see five default alert names with checkboxes beside them. Uncheck those you don't want to use. Keep the ones checked that you want.
      4. At the bottom of the screen will be some General Settings for your alerts such as a time delay and basic layout. Create the adjustments you need, then press Save Settings.
      5. Tabs for the individual alerts are placed next to General Settings. Click on the tabs to customize each alert with the image and sound you want to use.
      6. Once all of your customizations have been made, click Save Settings and click on the Click to Show Widget URL box at the top of the screen. Highlight this URL by double-clicking on it with your mouse and then copy it to your clipboard by right-clicking on it and selecting Copy.


      • Recommended Size: 750 x 250 pixels
      • Maximum File Size: 10MB
      • Accepted File Types: PNG (Static) & GIF / WEBM (Animated)


      BITE THE BULLET TWITCH PARTNER CHEERMOTE


      After you’ve become a partner with Twitch you unlock some very cool customization perks. The most exciting to many Twitch fans are the Cheermotes on your channel. You can set 5 unique cheermotes depending on each tier of Bits 1, 100, 1,000, 5,000, and 10,000. In simple mode you just need to upload the 112 x 112 size of your cheermote. In advanced mode you can upload in 5 different sizes: 28 x 28, 42 x 42, 56 x 56, 84 x 84, and 112 x 112.

      In most cases, simple mode will do just fine. The advanced mode is most useful when a cheermote looks best at higher resolutions, and is harder to distinguish at smaller resolutions.

      Bite The Bullet Interactives

      • Deeper levels of engagement between a streamer and their audience.
      • Infinite replayability.
      • All you can eat fun.


      Bite the Bullet features several Interactives to enhance the streamer, audience, and gameplay experience:


      Getting Set Up


      Getting started has never been easier! From the Title Screen, select Options:


      From the Options Menu, select Twitch Integration:


      Enter your Twitch Username into the field, and select CONFIRM:


      A successful login will will appear in the bottom left of the menu telling you that you are connected. After connecting, a Twitch emote will animated in the bottom right hand corner as well:


      Audience Voting

      Viewers earn points while watching and can spend them at any time to:

      • Refill Chewie’s HP
      • Spawn single enemies or groups of enemies
      • Spawn different tiers of randomized weapons
      • Spawn different kinds of items (nutrient pickups)


      “Popcorn” Engagement

      Viewers opt-in to a raffle system where they spend points to cause an in-game effect of their choice if they win.


      Summary:

      The bot says in the chat that a raffle is happening and gives exact instructions on how to participate (“Type !raffle followed by the name of a paid command. For example: !raffle spawnenemy”), and says how long the raffle will last. When viewers participate, the bot acknowledges them. When the duration of the raffle ends, the raffle winner is announced in game and chat, and their chosen effect. C takes place. A new raffle then begins.


      Detailed Description:

      While the player is in gameplay (not in the main menu or hub world) a bot will periodically announce a raffle, giving instructions on how to participate. Viewers follow the instructions given by the bot to ‘bet’ a fixed amount of points to participate in the raffle. The viewer can pick from any paid command in their submission to the raffle. If they win the raffle, their prize is the command they chose being applied in-game. For example, it costs 100 points to participate in the raffle, and you can put up a 1000-point cost command as your bet. If you win the raffle, your 1000 point command is applied to gameplay and it only costs you the risked amount of 100 points. The winner of the raffle is announced in chat (along with the effect they chose) and the raffle then repeats. Additionally, the name of the winner is shown in game in a popup, also showing the effect they chose.


      The instructions the bot provides at raffle start are:

      "A new raffle has begun! The raffle will last seconds. Type !raffle followed by the name of a paid command. For example: !raffle spawnenemy"

      The raffle has dynamic timings to prevent spam in inactive streams. If no viewers participated in the last raffle, the new raffle will wait several times longer for raffle entries to come in. The default raffle duration is 5 minutes. During this time, any viewer can cast in their raffle. If no one participated in the previous raffle cycle, the next raffle will last 25 minutes. As a baseline, the bot only sends messages at the beginning and end of the raffle - first to announce it is happening, and second to announce the winner. When a user submits a raffle entry, the bot responds stating that the user's submission has been received. Users are able to submit multiple raffle entries to improve their odds of winning, but each submission still has the same cost in points.


      Press Kits & Streamer Gifts for Bite the Bullet launch

      Guide for Twitch Images Size

      Guide for Twitch Images Size


      To set yourself apart from other streamers, having Twitch graphics for your channel is an absolute must. Using this guide we'll tell you all the sizes you can use on your Twitch channel for any form of graphic you can use. Includes image sizes for your panels, alerts, offline banners, profile photo, VOD thumbnail, and profile banner!


      You 're no longer alone when you're gaming with a Twitch channel — whether you're performing a raid or fighting evil forces, you have a whole crowd behind you cheering you on. Link to your fans and gain more followers by adding images that will give your Twitch channel a unique personality.


      TWITCH PROFILE PHOTO (AVATAR)


      Let's start with the basics of it. Your Profile Picture also referred to as an Avatar, is the primary image associated with your Twitch channel. The first impression of your stream brand will likely be a new viewer, so make it count.

      Remember that Profile Pictures are square unlike most other stream graphics – you'll need to use an aspect ratio of 1:1 (equal in height and width). Twitch recommends a minimum size of 200 x 200 pixels, with a maximum size of 256 x 256 pixels. If possible, we suggest using 256 x 256 to ensure the highest possible image quality – anything above this size and Twitch will automatically scale down your image. The maximum file size is 10 MB, and JPEG, PNG, & GIF are only the file types approved.

      Recommended Size: 256 x 256 pixels

      Maximum File Size: 10MB

      Accepted File Types: JPEG, PNG, GIF


      TWITCH PROFILE BANNER (COVER PHOTO)


      So, you caught their attention successfully and they are on your channel side. Now win them with an epic, imaginative Cover Picture.

      Now let's just think about the measurements. With the latest updates, Twitch suggests a resolution size of 1200 x 380 pixels. Any need to get fancy with image height anything smaller or larger than 380 pixels will automatically scale to the 380px needed. Again, at the moment max file size is 10 MB, and approved file types include JPEG, PNG, & GIF.

      One thing to remember here: the banner art should scale according to each user's window width. It means that if a user's browser window is wider than your picture width, your banner must extend. TDLR, keep your height constant @ 380 pixels, but the wider the image, the better it will scale – which means you could theoretically extend your width beyond 1200px for ultra-high - resolution (we saw a few banners as big as 3000px!).

      Recommended Size: 1200 x 380 pixels

      Maximum File Size: 10MB

      Accepted File Types: JPEG, PNG, GIF


      TWITCH OFFLINE BANNER (VIDEO PLAYER BANNER, STREAM SCREENS)


      Marathon-streams, late-night IRL chats, and G-FUEL 's unhealthy numbers ... who needs to sleep when you're having such fun? Yet for R&R, even the streaming gods need time off-camera. The question is, what happens when you're away from your channel? Okay, this is where banners offline come in. When viewers visit your channel, a static banner image featuring (hopefully) engaging visuals will welcome them and some of the channel info essentials. A well-designed Twitch Offline Banner hustles while you're asleep.

      The Twitch Offline Banner is comparatively straightforward when it comes to scaling. Stick to a 16:9 ratio, with suggested 1920 x 1080 dimensions for maximum resolution and efficiency. Do you want to keep it below 10 MB? Then stick to JPEGs & PNGs. Here's pretty cut-and-dry, people.

      So while we're at it, above there applies to your usual stream displays, too. You know, Start Screens, BRB Screens, Stream Stopping Screens, and so on. Just stick with the resolution & sizes above / below and you're good to go, playa.

      Recommended Size: 1920 x 1080 pixels

      Maximum File Size: 10MB

      Accepted File Types: JPEG & PNG


      TWITCH THUMBNAIL


      Often it all hits right on the line ... You 're in the field, the donations and subs are flowing, and talk is in heat. Save the bad boy out as a VOD to reshare with your community at a later date once the Stream Ending screen has rolled on. But a pro streamer knows that VODs alone do not guarantee views – to get followers to press, you'll want to upload an entertaining and innovative Thumbnail image.

      This one is pretty easy – to pull off an awesome Twitch thumbnail you don't need crazy graphic skills. You'll want to stick to the standard 16:9 aspect ratio, with an overall 1280 x 720 pixel dimensions. As simple as pie, stick with JPEGs or PNGs.

      Recommended Size: 1280 x 720 pixels

      Accepted File Types: JPEG & PNG


      TWITCH WEBCAM (OVERLAYS)


      So, you have opted to use an on-stream Webcam overlay. Cheers to that one. Soon, hundreds, if not thousands, of audiences all over the world will see that gorgeous smile of yours. Just don't look like a novice with a slipshod overlay – put some time & thought into your webcam concept and you'll be rewarded with it.

      There are two common Webcam choices to consider here: aspect ratios 16:9 or 4:3. In the end, the decision will depend on the resolution of your stream camera. While 16:9 seems to be more common, some streamers prefer Webcam frames of 4:3.

      Webcams are really a bit of an unusual ity from a production point of view. Pinning down precise sizes or proportions is difficult since streamers usually crop their Camera boxes over OBS to suit the image they 're looking for – or through rendering unique forms by masks, etc. Nearly always, the final frame will be scaled down and modified by each streamer to match their needs. Typically speaking, no two streamers can scale their cam the same wayit all comes down to personal choice.

      For such reason, it is difficult to prescribe a particular webcam size, while we consider making it as wide as possible. Start at the very least with 1920 x 1080 pixels, so that you maintain the consistency of the display when scaling down. Using a PNG (JPEGs are not recommended because they do not enable transparency) if your camera is static. Start with a GIF, for animated frames.

      Recommended Size: 1920 x 1080 pixels

      Accepted File Types: PNG (Static) & GIF (Animated)


      TWITCH PANELS


      Let's talk about your stream info ... If you've ever used the native header markdown on Twitch, you know it's a lot of BLEH. Heyyyy, groups of text, adios viewers. Really, do not get us sick. Veteran streamers use Panels to create sparkling, interactive channel profiles – without eye-soring. Present your most important channel information in meaningful, bite-sized bits while incorporating your stream brand and personality at the same time through unique designs.

      Okay, down to business – let 's talk about sizes. For Panel Headers, the maximum width is 320 pixels – something wider than that and Twitch will scale the image automatically. For height, creativity has a bit more leeway to you. Many streamers enjoy using shorter, horizontal panels with a simple segment title – 'ABOUT ME' or 'DONATE' or 'SOCIAL MEDIA' for example. For these, we suggest 75 pixels (or 320 x 75 px) in height. Others prefer taller, vertical (or square) panels allowing more text and image in the space, in which case we recommend a maximum height of 600 pixels (or 320 x 600 px). The streamers often like to mix in both types. It's your choice. Here, the maximum file size is 2.9 MB while we recommend that you stick to JPEG or PNG.

      Recommended Size: 320 x 75 pixels (Minimum), 320 x 600 pixels (Maximum)

      Maximum File Size: 2.9MB

      Accepted File Types: JPEG & PNG


      TWITCH ALERTS


      Let's be honest, we all want to be noticed by senpai – and that includes your viewers. Only think about some of the game 's largest streamers ... $10 promises you can remember their famous drops of alerts within seconds.

      Stream alerts can be one of the best resources for increasing the Twitch community and encouraging engagement with viewers. Set up your alerts properly, and each supporter, sub, host, or donation can expand your brand of streamer – and bring you one step closer to the pros.

      Unlike the other Twitch graphics listed here, Stream Alerts are generally managed via a third party streamer software, such as Streamlabs, and then connected to your OBS Studio. We suggest that you stick with the 750 x 250 pixel alert dimensions. Go for PNG files for static alerts (JPEGs aren't suitable, since they lack transparency). You'll want to use GIF or WEBM files for the animated alerts. The maximum file size here is 10MB.
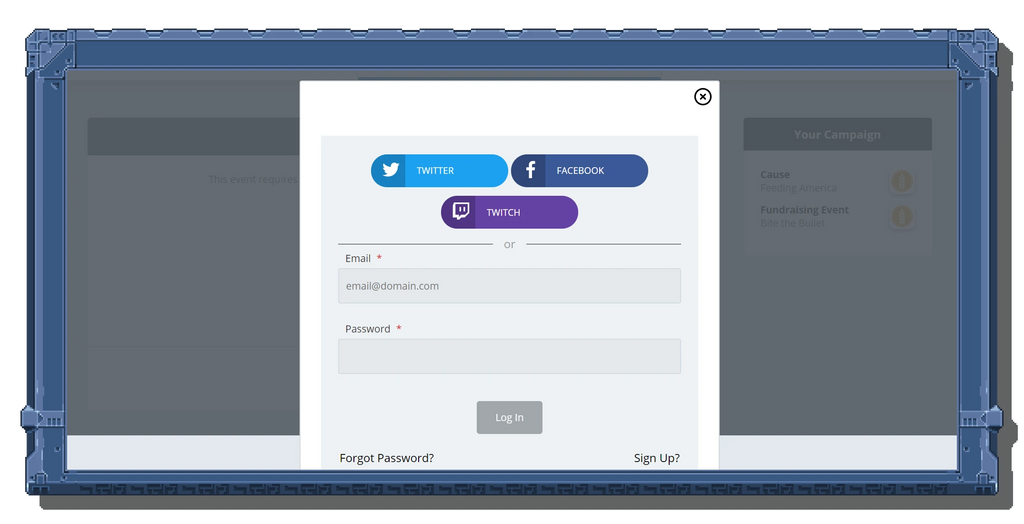
      Recommended Size: 750 x 250 pixels

      Maximum File Size: 10MB

      Accepted File Types: PNG (Static) & GIF / WEBM (Animated)


      Welp, this is the end of the guide, folks. Style guidelines and size specifications for all Twitch graphics. Now go ahead and rule the world of streaming like any faceroll-EZ, uber-tilted Bob Ross. The pen is in your hands and the streamer-sphere is your canvas.